This post is a short tutorial about how easily you can build a tax calculator with the help of the old but powerful AngularJs. (Please note: AngularJs is not the same as Angular) Yes I know, I’m talking about Angular 1 (aka AngularJs), and Angular 5 has just been released, so who the heck is using AngularJs nowadays? Well, you’d be surprised how many companies are still using it: https://trends.builtwith.com/javascript/Angular-JS. This is the first article of the full tutorial, where we’ll outline the structure of the functions that will perform the calculations, and then in the next section we’ll take a more in-depth look at how these functions will perform the calculations in a nice harmony together and how they will render the results on the frontend.
 To calculate the income tax and final net pay after all deductions, in the UK we’ll need to do a few complex calculations because the way the taxes are calculated: you have a personal allowance, which means that up to that sum you won’t pay any tax, and you’ll only pay tax on the sum that is above that personal allowance. Hence, our calculator has to take this into consideration. Then there are multiple tax bands that we need to consider when conducting the operation: you’ll pay 20% tax on the tax band one, 40% on earnings in the higher earnings tax band, and 45% in the highest earning tax band. To make things even more complicated, your personal allowance will drop by £1 after every £2 earned after a certain sum.
The above operations are only for tax – but apart from tax, we’ll need to calculate National Insurance as well. In the same way as with tax, you’ll also have a personal allowance on National Insurance, and there are multiple bands to calculate in this case as well.
Also, we don’t want to disappoint our users and leave them with incomplete information – we’ll also calculate their pension, student loan, and take-home pay, just to make sure they know how much money they’ll be left with to spend.
Why Choose Angularjs To Build A Tax Calculator?
We choose AngularJs over jQuery or other frameworks for a plethora of reasons, and the most important ones are:
- Directives to extend HTML attributes.
- Expressions to bind data to HTML.
- Scope to control variables.
- Two-way data binding.
- Rendering of HTML.
Another big deciding factor for choosing this framework for rendering our frontend HTML is because Google now crawls and indexes extremely well JavaScript based web applications. Why is this important? If you ever build an application with a JavaScript framework, the HTML that gets displayed to the user is not actually the HTML that sits on the server in the database. AngularJs re-compiles and replaces the initial HTML with it’s own version after it conducted all the operations with JavaScript. A traditional web crawler (like older versions of Google) can’t read this compiled and re-formatted HTML, they could only extract the actual HTML before it was manipulated by JavaScript. Nowadays, more and more search engines can render JavaScript driven web applications, therefore you can actually rank them on Google and build up an audience with your website.
Now let’s get down to planning, and see how we’ll build up our functions for our calculator.
First of all, we’ll need to define some global variables that we’ll be able to access across our applications. With these, we’ll define the tax rates for different tax bands, yearly allowance, student loan thresholds, and many more.
You’ll probably notice the special variable $scope – this is a variable that you’ll see very often in AngularJs. Scope is the glue between application controller and the view.
$scope.student_loan = {'plan_1': {'allowance': 17775 , 'rate': 9}, 'plan_2': {'allowance': 21000, 'rate': 9}, 'deductions' : 0};
$scope.student_loan_plan = '0';
$scope.student_loan_plan_options = '0';
$scope.this_student_loan_settings = {allowance: $scope.student_loan.plan_1.allowance, rate: $scope.student_loan.plan_1.rate, sum_over_the_threshold : 0};
$scope.student_loan_to_deduct = {yearly: 0};
$scope.scotland = 0;
$scope.no_national_insurance = 0;
$scope.is_blind = 'no';
$scope.is_scotland = 0;
//
//
//
var pension_percentage_cookie = $cookies.get('pension_percentage');
if (pension_percentage_cookie) {
}
else {
    pension_percentage_cookie = 0;
}
$scope.pension = {
    'value': 0,
    'percentage': pension_percentage_cookie,
    'deductable': {'yearly': 0},
    'contribution_period': 'monthly'
};
The variables
Here we’ll define all the variable that we need later on in our application. Apart from this, we’ll need the functions that we’ll use in order to perform the calculations:
$scope.calculateIncomeTax = function () {}
$scope.calculateNationalInsurance = function () {}
$scope.calculateStudentLoan = function () {}
$scope.calculatePension = function ()
$scope.calculateTakeHome = function () {}
And then a final one that we’ll call every time a value is updated on the frontend by the user, that will integrate all the above functions:
$scope.executeCalculations = function () {}
After all of our main calculator functions are defined, we’ll need another set of functions that will be a key part of our application: the watcher functions. These are AngularJs specific functions that watch any changes in the models, and perform an action that we define when the change happens – in our case, we’ll be calling a function.
$scope.$watch(‘earningsSliders.yearly’, function (newValues, oldValues, scope) {
$scope.executeCalculations();
});
The watcher above will “watch” whenever the user will change the value of the yearly income, and it will instantly initiate the calculations, real time.
The executeCalculations() function includes all the other functions that are needed to calculate our tax, national insurance, pension, student loan and take home pay.
First, in the executeCalculations() function, we calculate the income tax by calling the calculateIncomeTax() function, and update a global variable/model with the actual tax sum, so that we can have it available later on, when we’ll deduct it from the total earnings. Then we do the same with the national insurance – we’re calling the calculateNationalInsurance() to calculate the National Insurance for us. Then we do the same for the pension and student loan. Finally, after we’ve got the total tax, national insurance, pension, and student loan that we need to extract, we’ll simply extract the values from the gross earnings value, in the calculateTakeHome() function.
The Benefits Of Using AngularJS For This Project
The great thing about using AngularJs is the fact that you can render the modes (which are in a sense JavaScript variables) in the front end. For example, if you want to display the yearly earnings value in your html, just simply use the model (variable) name wrapped in double brackets, for example:
If you earn £{{earningsSliders.yearly}} a year, you’ll pay ££{{totaTaxAmount}} in tax.
This will be automatically rendered/transformed by AngularJs as:
If you earn £36,500 a year, you’ll pay £5,000 in tax.
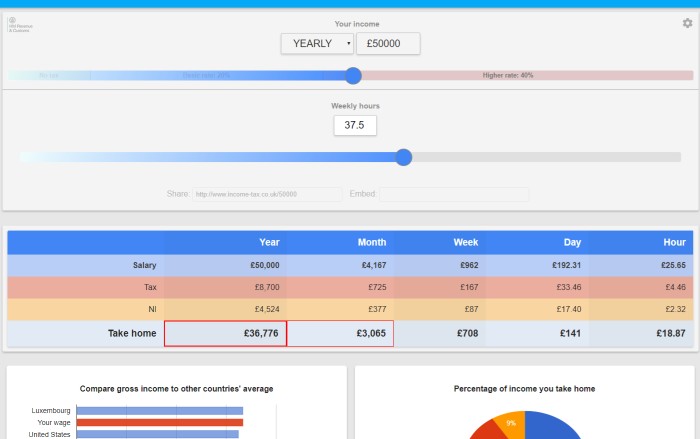
This is really useful in our case as you can see it on our live income tax calculator income-tax.co.uk, we can use any model/variable in our description texts, and even in the title of the website, and it will be rendered with the correct value.
In the next article from this set, we’ll be speaking about more specific actions and about the formula that we’ll be using to perform the calculations for tax, national insurance, pension and student loan. In the third section we’ll introduce you to how you can integrate AngularJs with WordPress, and also, how you can use a secret plugin that can generate you thousands of unique wordpress posts based on a data set uploaded via a CSV file – in 2 seconds.